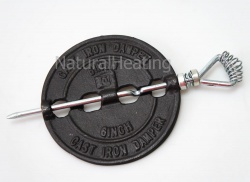
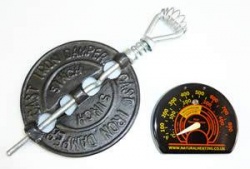
A Flue thermometer is a handy accessory to own. It gives a visual indication of when your stove is running too hot or not hot enough - so you can see easily when you need to refuel or alter the draw rate by means of either the stove vents or via a flue damper.
These flue thermometers are magnetic and simply "stick" to most flue pipes. However, they will not cling to stainless steel. For single wall stainless steel pipes, there is a little hole in the thermometer which will allow fixing in place with a small screw.
Select the size of damper you need to fit your flue pipe. These dampers fit to single wall flue pipe (vitreous or stainless). They cannot be fitted into twin wall insulated pipe
For example, if you have a 5" / 125mm diameter pipe, please select a 5" damper. Do note however, that the damper will be SMALLER than the internal diameter of the pipe, to allow it freely spin and for essential drawing away of gasses from the stove.
These are in-line dampers and fit INSIDE your pipe and not in the stove collar. Fitting instructions as below :
Damper Fitting Instructions
Prior to installing a damper, ensure that it's location will allow it to spin freely once installed. Ensure that the damper will be in a convenient location without obstruction from the top of the stove or cleaning access doors in the flue pipe for example. During installation, safety goggles / glasses should be worn at all times.
The following steps should ensure a simple installation :
1. Remove spindle from the main body. This is sometimes not as easy as it would appear, as the spring needs sufficient pressure exerted to enable satisfactory working when installed. A good method is to hold the damper by the main body with the pointed end of the spindle facing upwards, then carefully apply pressure downwards onto a scrap piece of wood or similar. When the main body is lowered down the shaft, twist the spindle to release the two main parts.
2. When free and decision has been made as to the location of the damper, a 6.5mm (1/4" approx) hole must be drilled at opposite parameters of the flue pipe. Drill very carefully as a snug fit is best. Extreme care should be exercised when drilling - especially into vitreous enamelled flue pipe. Masking tape may be applied to limit chipping. If the pipe has a cleaning access door, the holes must be below the access door !
3. Once the holes are drilled, the main body of the damper needs careful sliding into the flue pipe to the location of the holes. Whilst in situ, slide the centre of the spindle through the main body of damper, twisting where necessary to refit in it's original location through the main body.
4. Prior to installing the flue pipe with damper fitted, check that when the handle is horizontal, the damper also is (damper closed) and when vertical, that the damper also is (damper open)


